
O senhor instalou uma câmera de ré para ter mais tranquilidade, mas dar ré ainda parece complicado. Estacionar é sempre um desafio, e o senhor não se sente mais seguro. Esse é um problema comum.
Os erros mais comuns com a câmera de ré são apontá-la muito para cima ou muito para baixo, ter uma visão descentrada1, ignorando o campo de visão da câmera e sem testar o ângulo em diversas condições. A correção desses aspectos garante uma visão clara e abrangente, proporcionando maior segurança ao dar ré e ao estacionar.
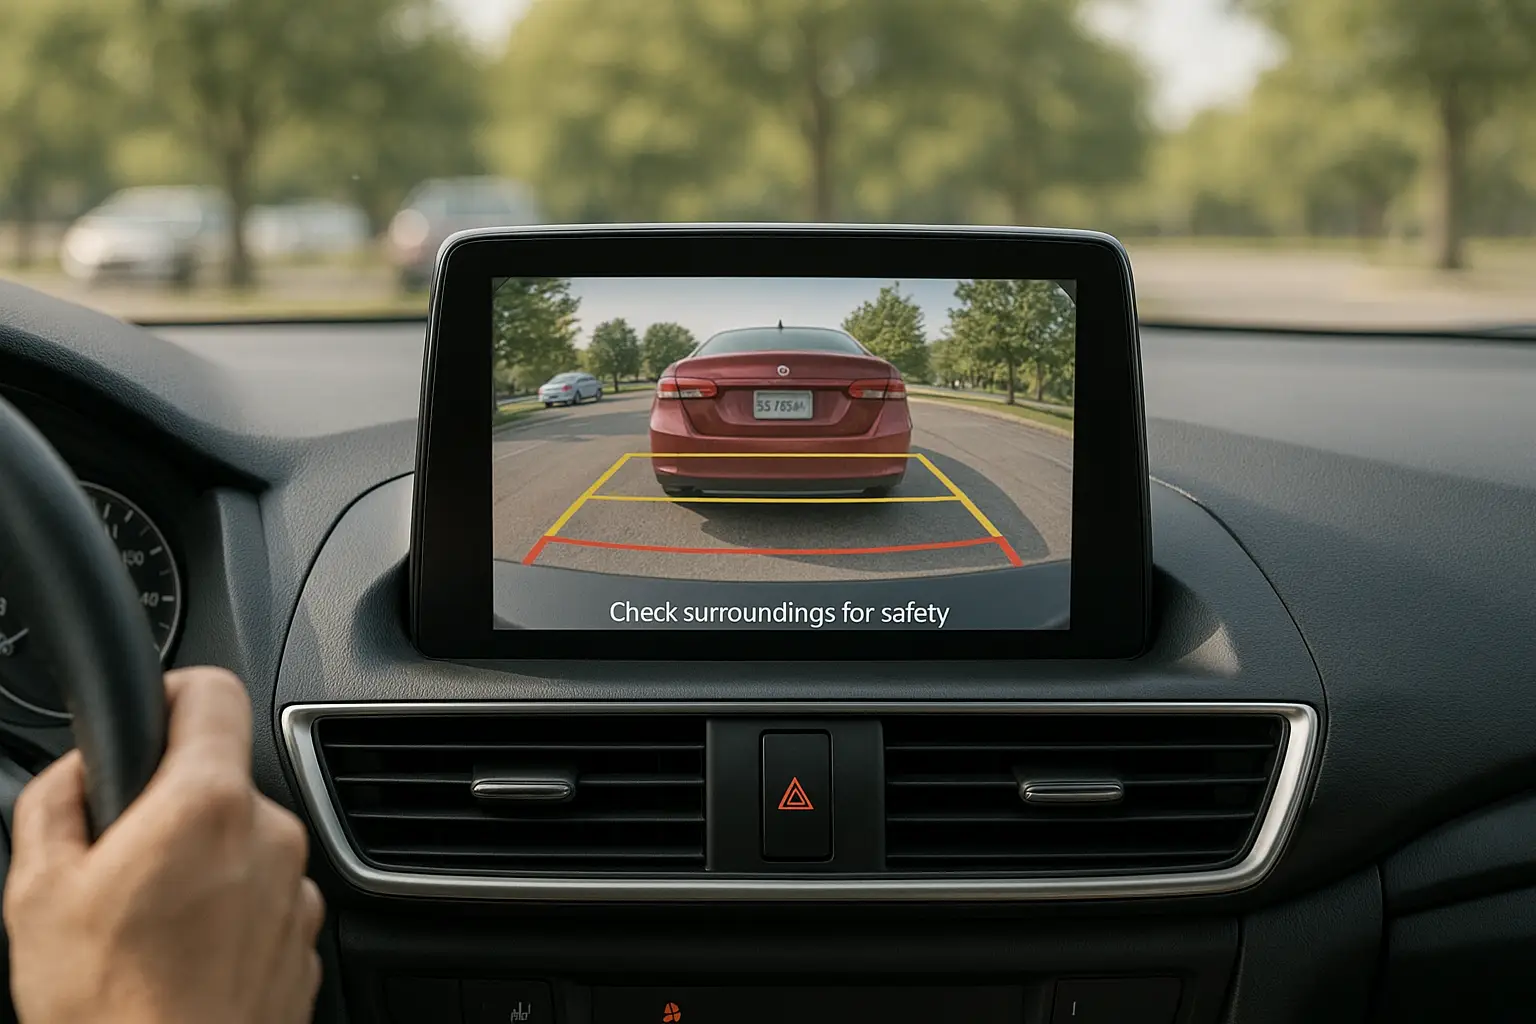
Ajustar corretamente o ângulo da câmera é uma das etapas mais importantes após a instalação. Vejo pessoas cometendo esses erros o tempo todo. Não se trata apenas de apontar a câmera para trás. Uma câmera mal posicionada pode criar novos pontos cegos e proporcionar uma falsa sensação de segurança. Vamos analisar cada erro, um por um, para que o(a) senhor(a) possa aproveitar ao máximo sua tecnologia de segurança. Esses detalhes são pequenos, mas fazem uma enorme diferença na sua segurança ao dirigir no dia a dia.
Sua câmera está apontada muito para cima, deixando de detectar obstáculos baixos?
A tela da sua câmera mostra uma excelente visão do carro atrás de você, mas e quanto ao meio-fio? Um ângulo elevado oculta os perigos que se encontram próximos ao solo.
Um ângulo muito alto foca em objetos distantes e não detecta obstáculos baixos, como meios-fios, blocos de estacionamento ou até mesmo a bicicleta de uma criança. Para corrigir isso, você deve inclinar a câmera para baixo até que o para-choque do seu veículo fique visível na parte inferior da tela.
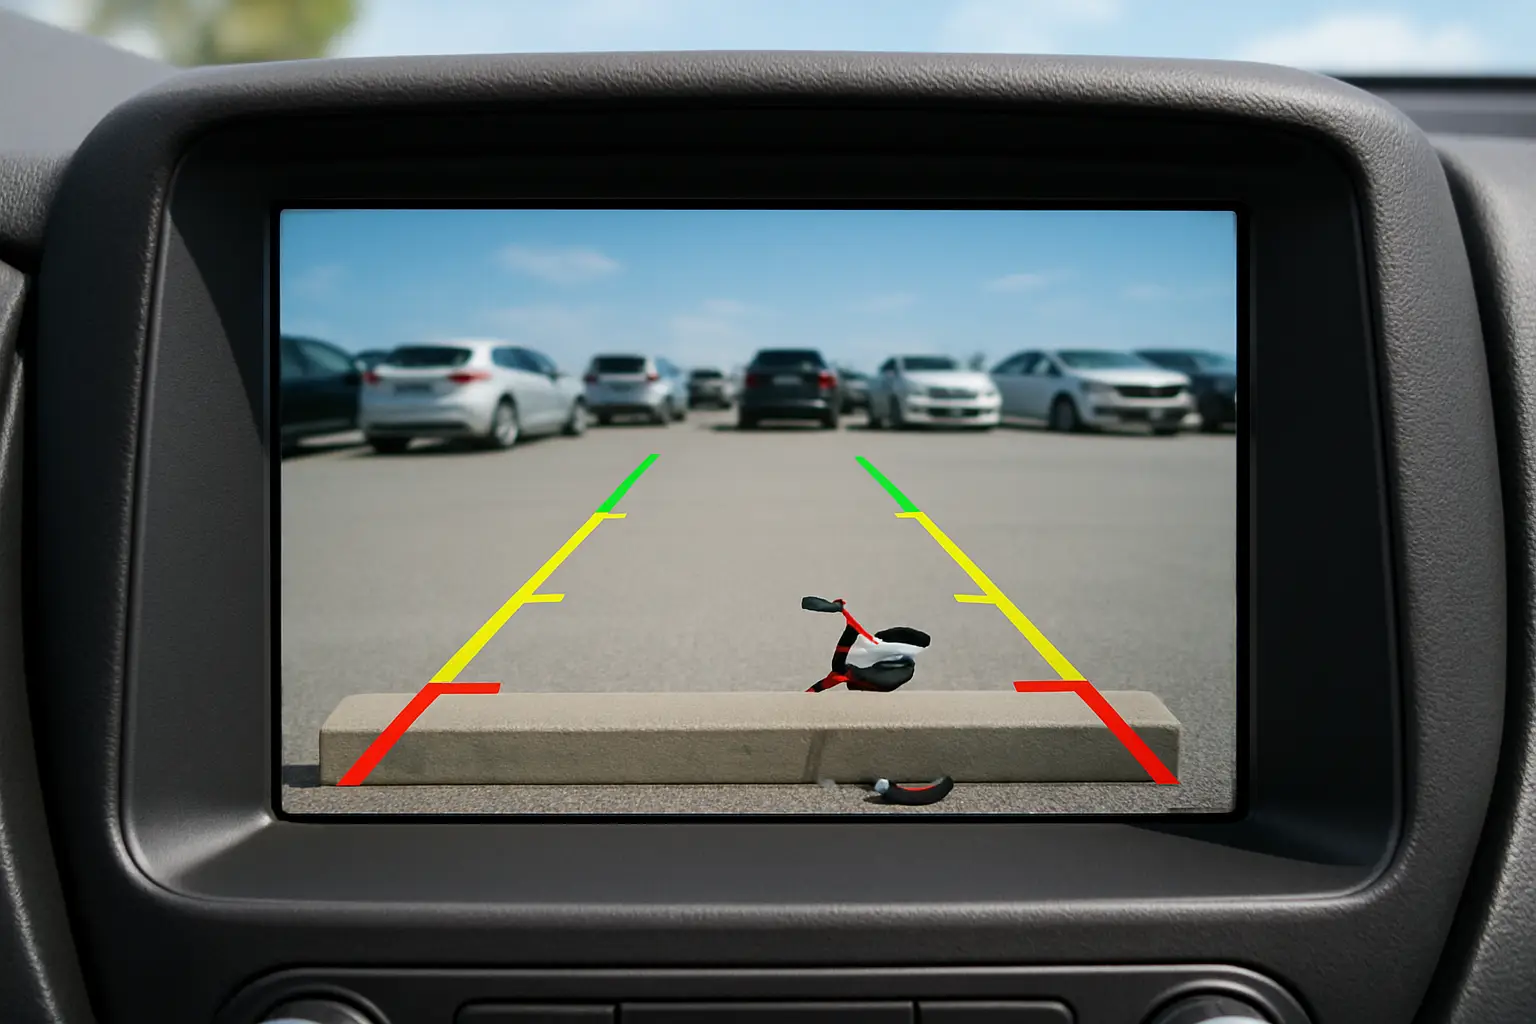
Quando ajudo amigos a instalar suas câmeras, essa é a primeira coisa que verifico. Um ângulo elevado oferece uma excelente visão do horizonte, mas cria um ponto cego perigoso logo atrás do seu veículo. O senhor pode ver perfeitamente um carro estacionado a 20 pés de distância, mas não verá o bloco de concreto do estacionamento a apenas dois pés do seu para-choque. É assim que os para-choques ficam arranhados e os acidentes acontecem. Lembro-me de ter ajudado um amigo que reclamava que sua nova câmera era inútil. Olhei para a tela dele e vi uma bela vista do céu e dos telhados distantes. Passamos dois minutos ajustando a câmera para baixo. Ele ficou chocado ao ver o parapeito baixo de tijolos que, sem saber, vinha arranhando há semanas. O objetivo é a segurança, e isso começa com a capacidade de ver o que está imediatamente atrás de você.
Por que um ângulo elevado é perigoso
Um ângulo de câmera elevado cria um ponto cego significativo na área onde se encontram os obstáculos mais críticos. Isso transmite uma falsa sensação de confiança, pois a visão parece clara, mas o perigo real está oculto logo fora do enquadramento. Isso torna quase impossível avaliar os últimos pés ao dar ré em um espaço apertado.
Como corrigir isso
A solução é simples. É preciso criar um ponto de referência adequado.
| Visão incorreta em ângulo elevado | Visão do ângulo correto |
|---|---|
| Não consegue ver o próprio para-choque. | Seu para-choque está visível na parte inferior da tela. |
| O foco está em objetos distantes. | O foco está na área imediatamente atrás do carro. |
| Objetos baixos não são visíveis. | É possível ver claramente meios-fios, linhas de estacionamento e objetos pequenos. |
Sua câmera está posicionada muito baixa, criando uma imagem em que só se vê o chão?
O senhor consegue ver cada pedrinha e cada rachadura no asfalto atrás de si. Mas não consegue ver um carro ou um pedestre se aproximando. Esse tipo de visão de túnel2 é extremamente perigoso.
Se a câmera estiver posicionada muito baixa, será possível ver apenas o solo imediatamente atrás do seu carro. Isso torna impossível avaliar a distância em relação a outros veículos ou enxergar o tráfego que se aproxima lateralmente. A visão ideal deve incluir o para-choque na parte inferior e uma visão clara da área mais atrás do veículo.
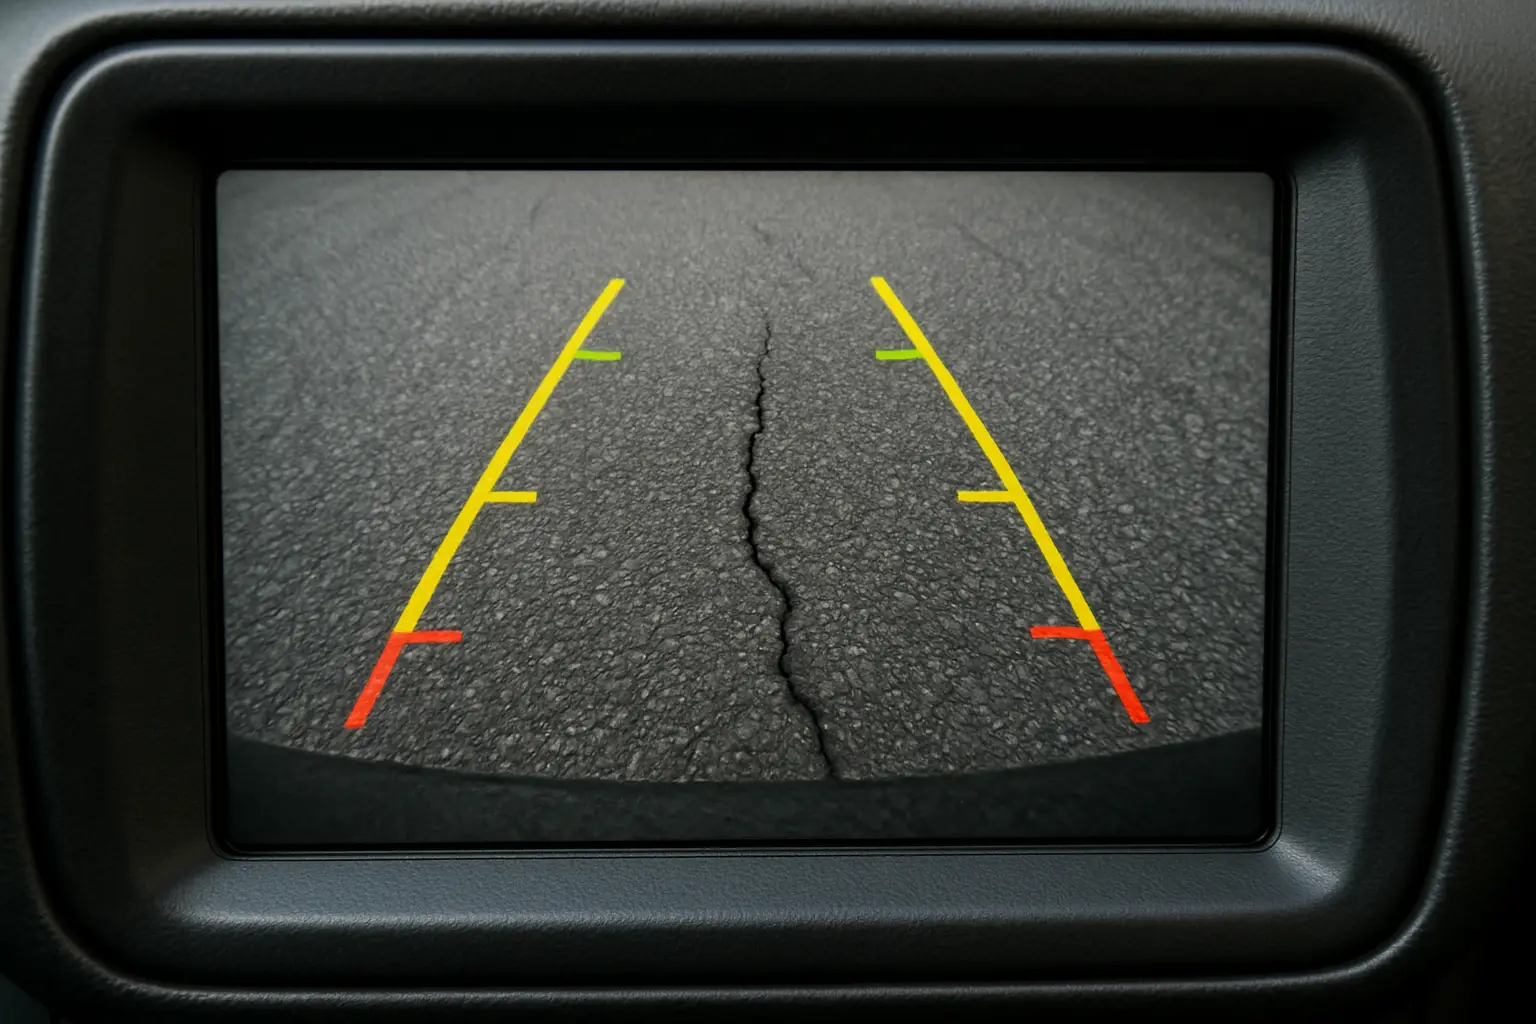
Esse é o problema oposto ao ângulo elevado, mas pode ser igualmente perigoso. Eu chamo isso de "visão de formiga". O senhor tem uma visão incrível e em alta definição de cerca de três pés de asfalto. Embora não vá bater em um meio-fio baixo, o senhor não tem absolutamente nenhum contexto do que está acontecendo ao seu redor. Será que um carro está prestes a passar em alta velocidade pela faixa em que o senhor está dando ré? Será que há um pedestre caminhando atrás daquela van estacionada? O senhor não saberá até que seja tarde demais. Sua câmera de ré deve ampliar sua percepção, não limitá-la. Ela precisa complementar suas verificações nos espelhos e seus movimentos de cabeça, proporcionando-lhe uma visão completa. Ver apenas o chão diretamente atrás de si é como tentar dirigir olhando apenas para os próprios pés.
O problema da visão de túnel
Um ângulo de visão baixo impede que o senhor avalie a profundidade e a velocidade. Tudo o que o senhor vê é uma área do solo, o que dificulta avaliar a distância a que se encontram outros objetos. Isso é especialmente perigoso em estacionamentos movimentados ou ao dar ré para entrar na rua.
Encontrando o ponto ideal
É necessário ter uma visão equilibrada que mostre tanto o solo imediato quanto a paisagem ao fundo.
| Etapa | Ação | Objetivo |
|---|---|---|
| 1. Comece devagar | Aponte a câmera para baixo até que você veja apenas o chão. | Estabelece uma linha de base. |
| 2. Incline para cima lentamente | Incline a câmera para cima gradualmente. | Amplie a visualização do plano de fundo. |
| 3. Encontre o seu para-choque | Pare quando o seu para-choque aparecer na borda inferior. | Creates a crucial reference point for distance. |
| 4. Check the View | Ensure you see the ground, your bumper, and the scene. | Confirms a balanced, safe, and useful angle. |
Is Your Camera's View Skewed to One Side?
You think you're backing up straight, but the camera shows you're about to hit the parking line. An off-center camera makes simple maneuvers incredibly frustrating.
An off-center camera gives a distorted, skewed perspective. It makes one side of the car seem closer to objects than it is. This ruins your depth perception3 and makes centering the vehicle in a parking space extremely difficult. Always ensure the camera is mounted in the exact horizontal center of your vehicle.
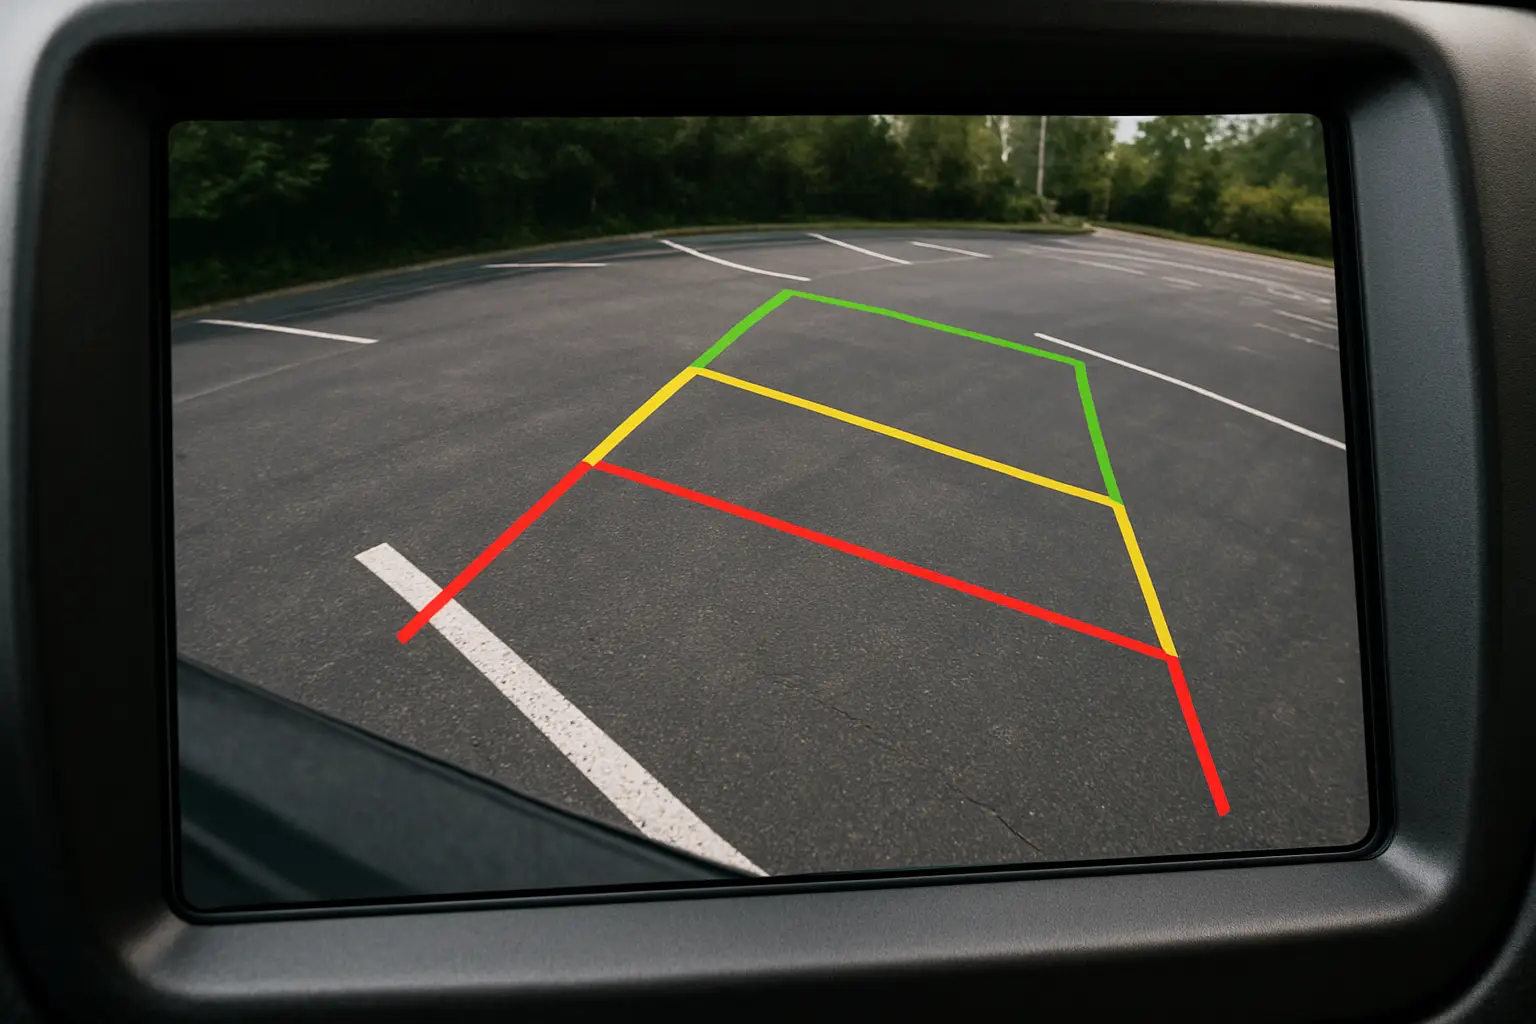
This mistake is less about the angle and more about the mounting location. Many people install a camera slightly to one side to avoid a trunk handle or license plate light. I understand the temptation, but it completely defeats the purpose of the on-screen parking guidelines. Those lines are programmed to assume the camera is in the center. When it's off-center, the lines are wrong. Your brain and the camera are telling you two different things. I once installed a camera about an inch off-center on my own project car. The skewed view drove me crazy. Parallel parking felt like a guessing game. I finally spent the time to drill a new hole and mount it in the true center. The difference was immediate. Everything lined up perfectly, and parking became intuitive again.
Why Symmetry Matters
Your brain uses symmetry to judge space and distance. When the camera view is asymmetrical, it disrupts this natural ability. The parking grid lines become a source of confusion rather than help, forcing you to constantly second-guess your position.
How to Achieve a Centered View
| Symptom of an Off-Center Camera | Solução |
|---|---|
| Parking lines on screen don't match reality. | Measure the width of your trunk/tailgate and mark the exact center. |
| One side of the view seems "stretched." | Mount the camera lens on that center mark. |
| You feel crooked when the screen shows you are straight. | If you can't mount it in the center, turn off the grid lines to avoid confusion. |
Do You Understand Your Camera's Field of View?
You bought a camera with the widest angle possible, thinking it sees everything. But that "fisheye" effect can warp reality, making objects seem much farther away than they are.
A wide field of view (FOV) is great for seeing more area, but it can create a "fisheye" distortion. This effect warps the image, especially at the edges, making objects appear farther away than they actually are. A camera with a 170-degree FOV often provides the best balance of coverage and accuracy.
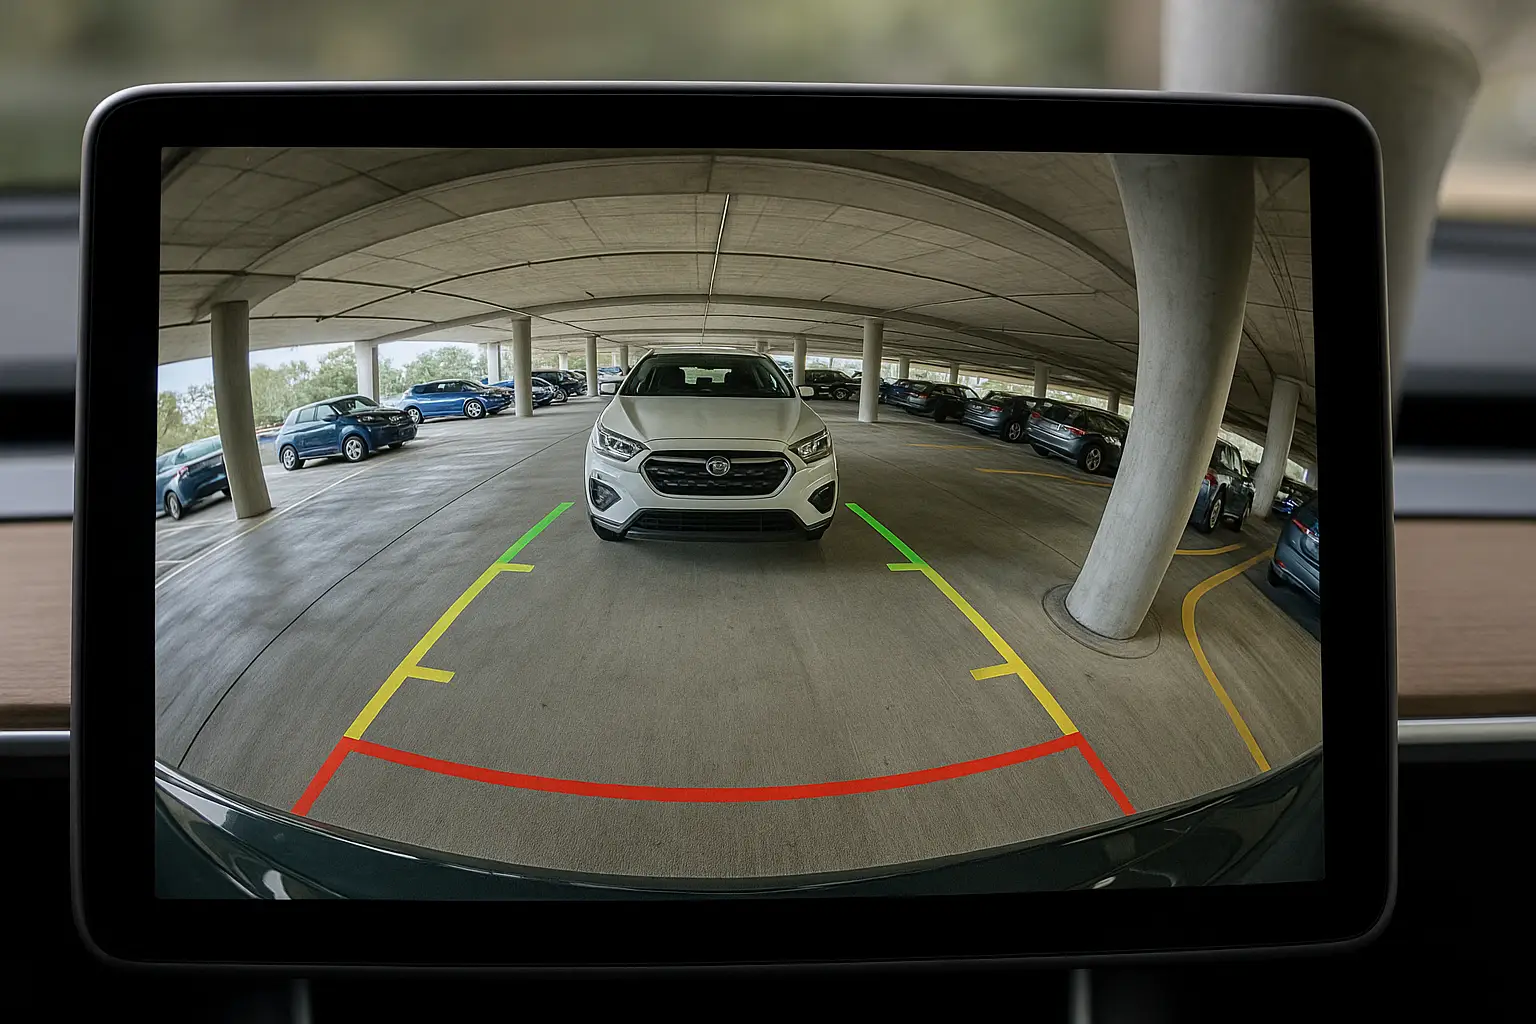
Field of view, or FOV, is a specification that many people misunderstand. They think bigger is always better. A camera with a 190-degree or 210-degree FOV can certainly see from one side of your bumper to the other. However, to capture such a wide image with a small lens, the image has to be bent. This is the "fisheye" effect. The center of the image is fairly accurate, but objects at the far edges of the screen will look curved and much smaller, or farther away, than they are in reality. You might see a pillar at the edge of your screen and think you have plenty of room, but in reality, your bumper is just inches from scraping it. That's why at VST Tech, we've found that a 170-degree FOV is the sweet spot. It provides excellent coverage without the extreme, dangerous distortion of ultra-wide lenses.
What is Field of View (FOV)?
FOV is simply the width of the area, in degrees, that the camera can capture. A wider FOV captures more of the scene, while a narrower FOV is more zoomed in and has less distortion.
Choosing and Using the Right FOV
Understanding the trade-offs is key to using your camera safely.
| FOV Type | Pros | Cons |
|---|---|---|
| Narrow FOV (<120°) | Very little image distortion. Distances are accurate. | Creates large blind spots to the sides. |
| Wide FOV (170°) | Excellent side-to-side visibility. Great for seeing cross-traffic. | Minor, manageable fisheye distortion at the edges. |
| Ultra-Wide FOV (190°+) | Sees almost everything behind the car. | Significant fisheye distortion. Objects at edges are closer than they appear. |
O senhor testou o ângulo da câmera apenas na sua garagem?
The view looked perfect in your flat, well-lit garage. You backed up once, and it seemed fine. But when you tried to park on a steep hill, the camera was suddenly useless.
An angle that works perfectly on a flat surface might be completely wrong on an incline or in the dark. A steep hill can make a good angle point uselessly at the sky or the ground. Always test your camera angle in various real-world conditions4 to find the best all-around setting.
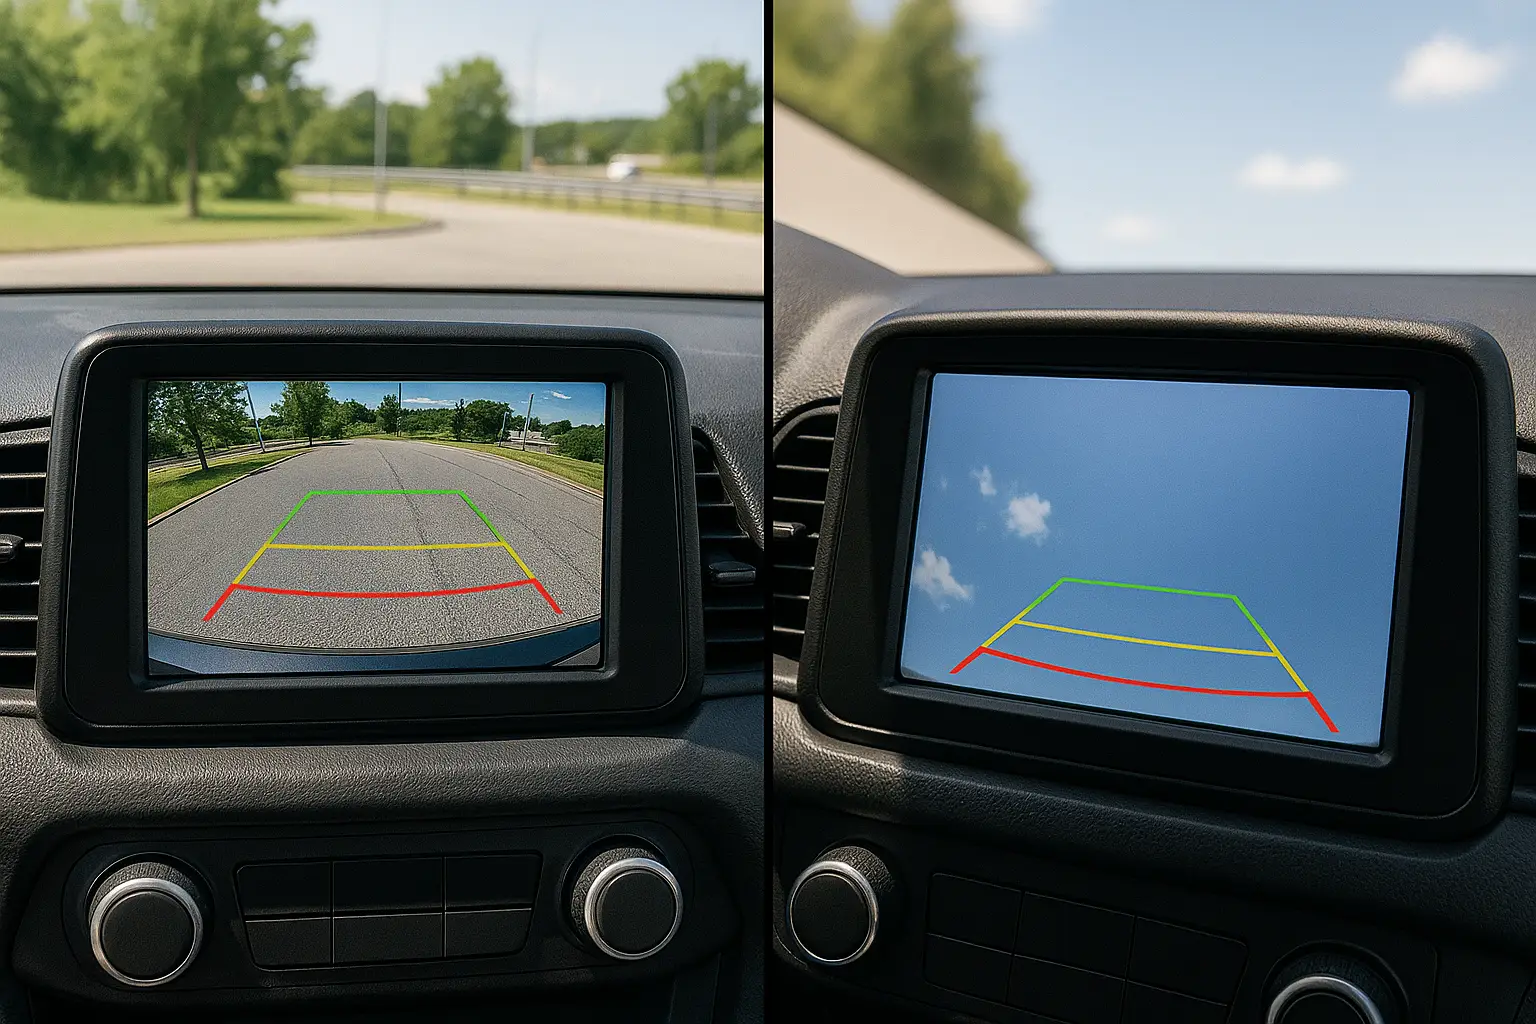
This is the final check that ties everything together. Your car doesn't just exist in your garage. You drive it in bright sun, at night, in the rain, and on hills. Each of these conditions can affect how useful your camera's view is. For example, an angle that seems fine during the day might pick up terrible glare from your license plate lights at night, washing out the image. An angle that works on flat ground might point straight into the asphalt when you're backing up a steep driveway. You have to find a compromise angle that works well enough in all conditions. After I set an initial angle, I always take the car out and test it in a few challenging, real-world spots. It only takes ten minutes, but it ensures the camera will be a reliable tool when I actually need it.
Why One Test Isn't Enough
The relationship between your car and the ground changes constantly. A static test in a perfect environment doesn't prepare you for dynamic, real-world situations. You need to ensure your view is reliable everywhere.
A Real-World Testing Checklist
Find an angle that performs acceptably across all these tests.
| Scenario | What to Check For |
|---|---|
| Bright Daylight | Check for sun glare on the lens or screen. |
| Dark Night | Check for glare from license plate lights. Is the image clear enough? |
| Parking on an Incline | Does the camera still show the ground and objects, not just the sky? |
| Parking on a Decline | Does the camera still show approaching traffic, not just your bumper? |
| Parallel Parking | Can you clearly see the curb and the car behind you? |
Conclusão
A backup camera is a powerful safety tool, but only if it's set up correctly. Avoiding these five common mistakes—aiming too high or low, mounting off-center, misunderstanding FOV, and failing to test—is critical.
My entire mission in starting VST Tech was to use technology to prevent avoidable accidents and protect lives. A properly adjusted backup camera is a perfect example of this mission in action. It's not just a gadget; it's an active safety system that needs to be calibrated for your specific vehicle and driving conditions. Take the ten minutes to get the angle right. It's a small investment of time that provides a huge return in safety and confidence every time you put your car in reverse. Your safety is worth it.
-
Get tips on correcting an off-center camera view for better depth perception while parking. ↩
-
Explore the concept of tunnel vision in driving and strategies to maintain awareness. ↩
-
Learn about depth perception and its critical role in safe driving and parking. ↩
-
Understand the importance of testing your backup camera in real-world conditions for reliability. ↩