Have you ever thought about installing a wireless backup camera system on your own? Some might think, "That sounds complicated!" But don't worry—this guide will take you through the process step by step. By the end, you'll see that setting up a wireless camera system can actually be quick and straightforward, often taking just 1-2 hours to complete. It’s easier than you might think!
The Benefits of a Wireless Backup Camera System
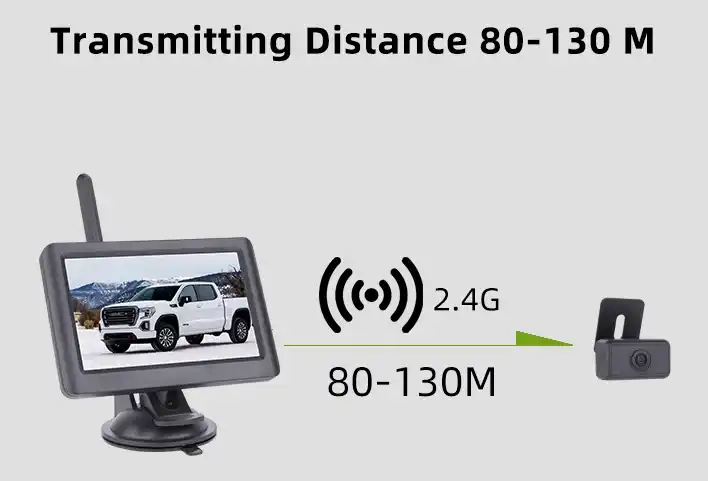
A wireless backup camera system is essential for enhancing vehicle safety, especially for larger vehicles like trailers, RVs, and trucks, where rear visibility is often limited. By eliminating the need for long wiring, these systems simplify installation, as the camera transmits a live video feed wirelessly to a display in the vehicle’s cab, providing a real-time view of obstacles, pedestrians, or other vehicles behind. This clear, wide-angle view helps minimize blind spots and the risk of collisions, particularly in tight or crowded areas. Additionally, many systems activate automatically when the vehicle is put in reverse, making them intuitive and convenient. Designed to withstand various weather conditions, most wireless backup cameras are waterproof and durable, often equipped with night vision for better performance in low light. In addition to safety benefits, a wireless backup camera system adds modern functionality to the vehicle, potentially increasing its resale value, and making it a valuable investment for safer, more confident driving.
Essential Tools and Equipment Needed to Install a Wireless Backup Camera System
Screwdrivers (both Phillips and flathead) – for mounting screws and adjustments
Drill and Drill Bits – for creating mounting holes, if necessary
Measuring Tape – to position the camera accurately
Electrical Tape – for securing and insulating wires
Wire Strippers – for preparing wires to connect the power supply
Pliers – for holding and bending wires
Socket Wrench Set – for tightening bolts, especially for larger vehicles
Zip Ties or Cable Clips – to keep wiring organized and secure
Multimeter – for testing the electrical connections to ensure proper power flow
You also can refer to this video step-by-step to install.
Unboxing and Inspecting Components
Upon unboxing your wireless backup camera system, start by laying out all the components listed in the manual to ensure everything is accounted for. Key parts to look for typically include:
- Camera – This is the primary component that captures the rearview and often comes with a mounting bracket for easy installation on the back of your vehicle.
- Monitor – The display screen, usually designed to be mounted on the dashboard or windshield, that shows the live feed from the camera.
- Antennas – For wireless models, antennas are attached to the camera and monitor to provide stable signal transmission.
- Power Cables and Connectors – These cables power both the camera and monitor. Some may connect to your vehicle's reverse lights or a 12V outlet, depending on the setup.
- Instruction Manual – A guide that provides detailed steps for installation, pairing, and troubleshooting.
Attention:
Monitors and cameras usually come pre-paired from the factory, ready to work out of the box. However, it’s best to double-check by connecting them briefly before installation to ensure everything functions properly—avoiding any pairing issues after setup.
Choosing the Installation Location
Choosing the right installation location for your backup camera and monitor is crucial to ensure optimal visibility and functionality. Here’s how to identify the best spots for each component:
Camera Placement
Ideal Location
The camera should be positioned at the rear center of the vehicle to capture a wide and balanced view of the area behind. This ensures minimal blind spots and a clear line of sight.
Height and Angle
Mount the camera at a height that allows it to capture ground-level objects and other vehicles. A lower position might not cover a wide area, while a very high placement can create blind spots close to the rear. Adjust the camera angle to ensure it covers both the ground near the vehicle and further away.
Vehicle-Specific Placement Tips
Trailers:
Place the camera centrally at the back of the trailer, ideally near the top, to capture the full width of the trailer's rear and to accommodate trailer height.
RVs:
RVs benefit from high-mounted cameras near the rear roofline, which maximizes the field of view. Ensure it is angled down enough to capture the immediate rear area.
Pickup Trucks:
For pickups, mounting just above the license plate or on the tailgate works well, providing a close view when backing up to trailers or loading docks.
Monitor Placement
Dashboard or Windshield Mounting
The monitor should be within the driver’s natural line of sight but should not obstruct the front view. Most drivers mount it either on the dashboard or the lower windshield.
Driver Accessibility
Mount the monitor where it’s easy to glance at without having to shift focus away from driving. For most vehicles, a spot slightly to the right of the steering wheel works best, allowing a quick, safe view.
Vehicle-Specific Placement Tips
Trailers and RVs:
For these larger vehicles, the monitor must be easily visible, as they rely heavily on the camera feed. A dashboard mount works well here.
Pickup Trucks:
A smaller monitor mounted near the center console or on the windshield is effective, as it minimizes distractions while providing clear visibility.
Installing the Wireless Camera and Monitor
Camera Installation
Step 1: Mount the Camera
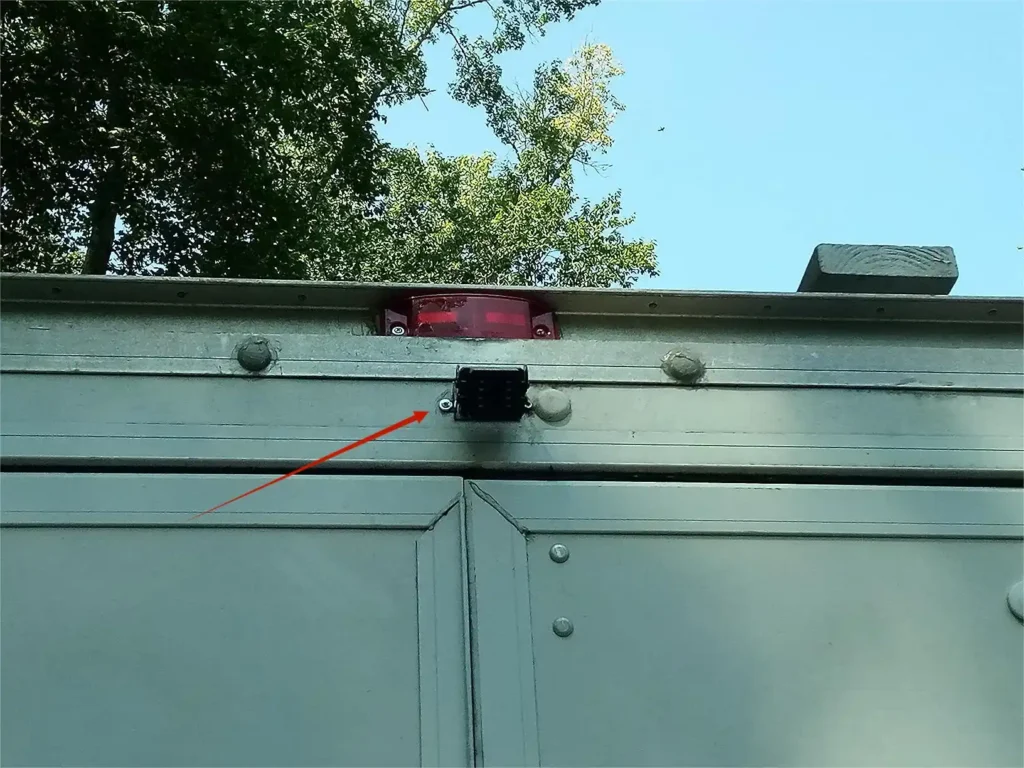
Begin by selecting the ideal location at the rear of the vehicle for mounting the camera, typically centered for the best visibility. Once you have determined the spot, mark where you’ll need to drill holes if required, ensuring that the bracket will sit level to avoid a tilted view. Drill the necessary holes and attach the mounting bracket securely with the screws provided. Finally, fix the camera onto the bracket, adjusting its angle to ensure a full view of the area behind your vehicle.
Step 2: Connect the Power Wires
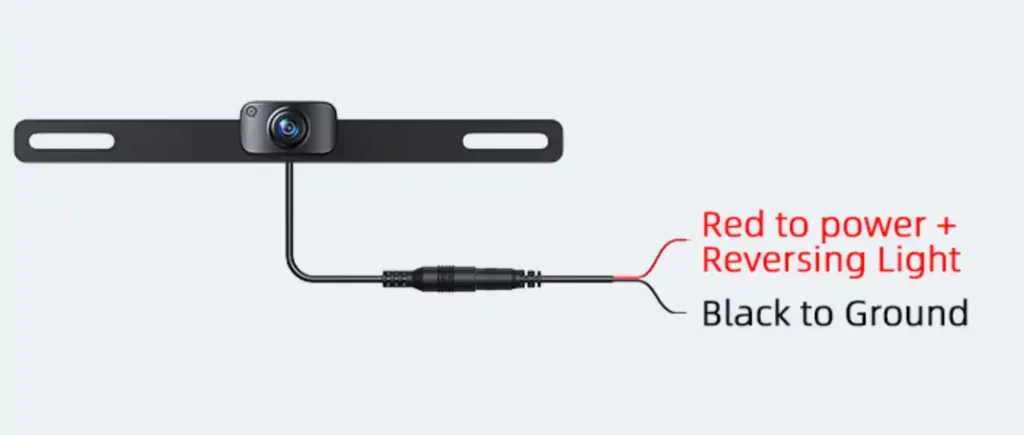
To power the camera, locate the reverse light wiring by accessing the tail light housing in the trunk or tailgate area. Once you’ve identified the positive and negative reverse light wires, use wire strippers to expose a small section of each wire. Connect the camera’s power wires by attaching the red wire to the reverse light’s positive wire and the black wire to the negative wire. Secure each connection with electrical tape, and use zip ties to organize the wires neatly along the vehicle frame, ensuring a safe and tidy setup.
Monitor Installation
Step 1: Choose and Attach the Mount
First, decide on the mounting method that best suits your vehicle’s interior and your personal preferences. If you prefer a stable, semi-permanent setup, use an adhesive mount. Clean the area on the dashboard where you plan to place the monitor, then attach the adhesive mount, pressing it firmly to ensure a secure hold. Alternatively, if you want flexibility in positioning or plan to remove the monitor occasionally, a suction cup mount is a great option. Simply clean the windshield, press the suction cup in place, and secure it by pushing down on the lock lever if available. This method allows easy adjustments and provides a stable view.
Step 2: Connect to Power via the Cigarette Lighter or Ignition
With the monitor mounted, you can choose either the cigarette lighter port or the vehicle’s ignition wiring for power, depending on your preferences. The quickest option is to use the cigarette lighter: simply plug the power adapter into the lighter socket and connect it to the monitor. This approach allows the monitor to power on automatically whenever the vehicle is running. For a more integrated setup, you can connect the monitor directly to the vehicle’s ignition wiring. To do this, locate the ignition power wiring (typically near the fuse box), and connect the monitor’s positive and ground wires accordingly. This setup will ensure that the monitor only activates when the vehicle is turned on, providing a seamless, built-in look and functionality. For this method, you may want to consult a professional installer if you’re unfamiliar with vehicle wiring.

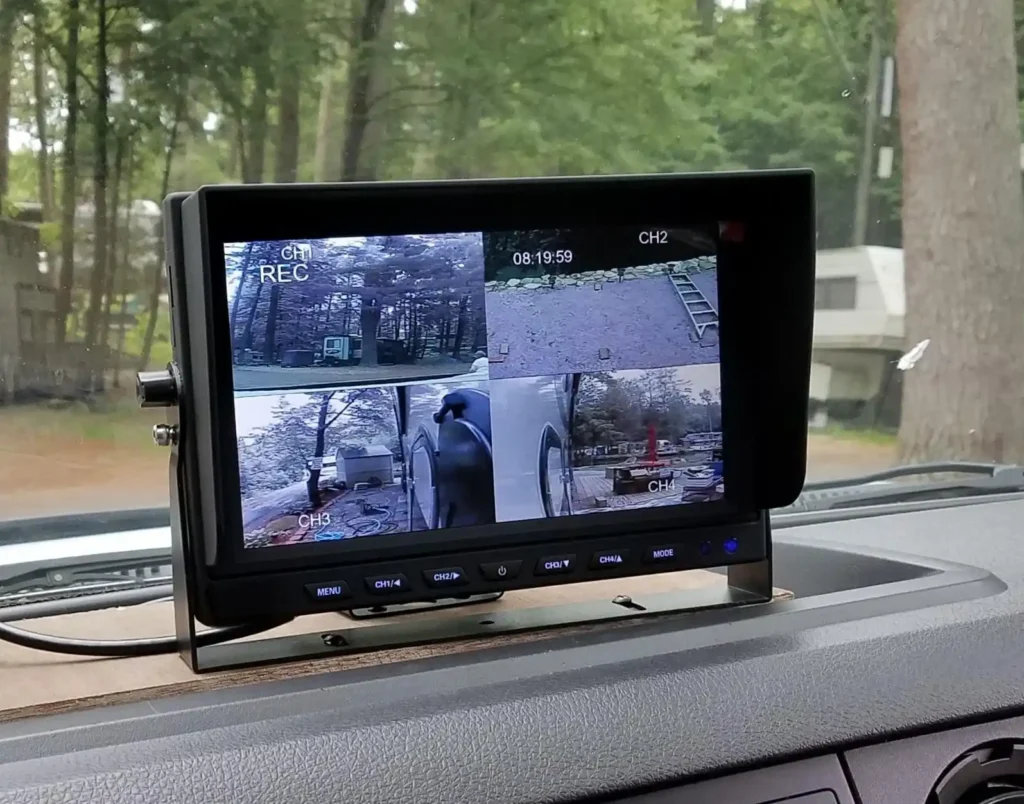
Step 3: Test and Adjust the Monitor Position
Finally, turn on the monitor to check that it’s receiving power and displaying a clear view from the backup camera. Make any necessary adjustments to the monitor’s angle and positioning to ensure it’s easily visible while driving. If you’re using a suction cup, you can adjust its placement on the windshield as needed, while adhesive-mounted monitors may only need slight angle adjustments. Once everything is in place, you’ll have a reliable, clear display for your backup camera, enhancing your safety and convenience when reversing.
Connecting and Pairing
To pair your wireless backup camera with the monitor, follow the specific instructions in your system’s manual, as pairing procedures may vary by model. Generally, turn on both the camera and monitor, then enter pairing mode on the monitor (often by pressing a designated button or navigating through the menu). Wait a few moments for the devices to connect, ensuring they are within a reasonable range for a stable signal. Once paired, adjust the camera’s angle to optimize its view, covering the vehicle’s blind spots and providing a clear, wide field. Test the view from the monitor to confirm that the camera’s position gives full rear visibility, and make small adjustments as needed.
Testing and Troubleshooting
After pairing, shift the vehicle into reverse to test the system, ensuring the camera feed appears clearly on the monitor. Check that there is minimal delay or interference in the image. If you encounter issues, such as a fuzzy picture or intermittent signal, there may be signal interference; in this case, check for potential obstacles between the camera and monitor, and consider relocating the monitor or adjusting the camera’s position slightly. For power issues, verify all connections, particularly those to the reverse light or ignition, and ensure the wiring is secure. If problems persist, consult the user manual for model-specific troubleshooting steps or reach out to the manufacturer for support.
Conclusie
Congratulations on successfully installing your new wireless backup camera on your vehicles! Now, you can back up with confidence and enjoy peace of mind on your travels. With the right tools and a good grasp of the wiring process, setting up a wireless rear-view camera system can be a straightforward task. So, what do you think? Are you ready to tackle the installation yourself, or would you prefer to leave it to a professional? Feel free to share this article with your fellow enthusiasts and let us know your thoughts in the comments!