
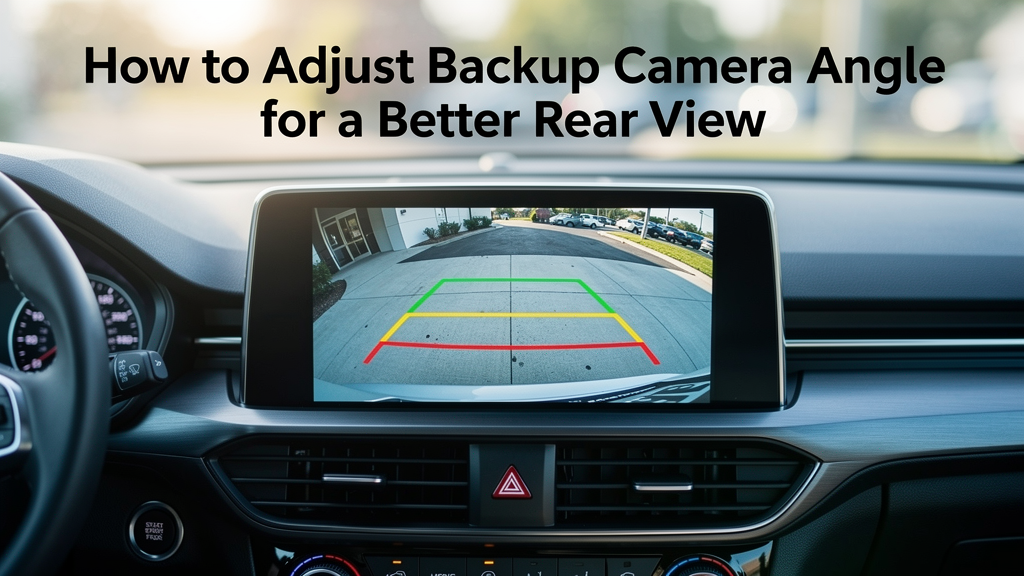
A backup camera can show a clear image, but still be difficult to use if the angle is wrong.
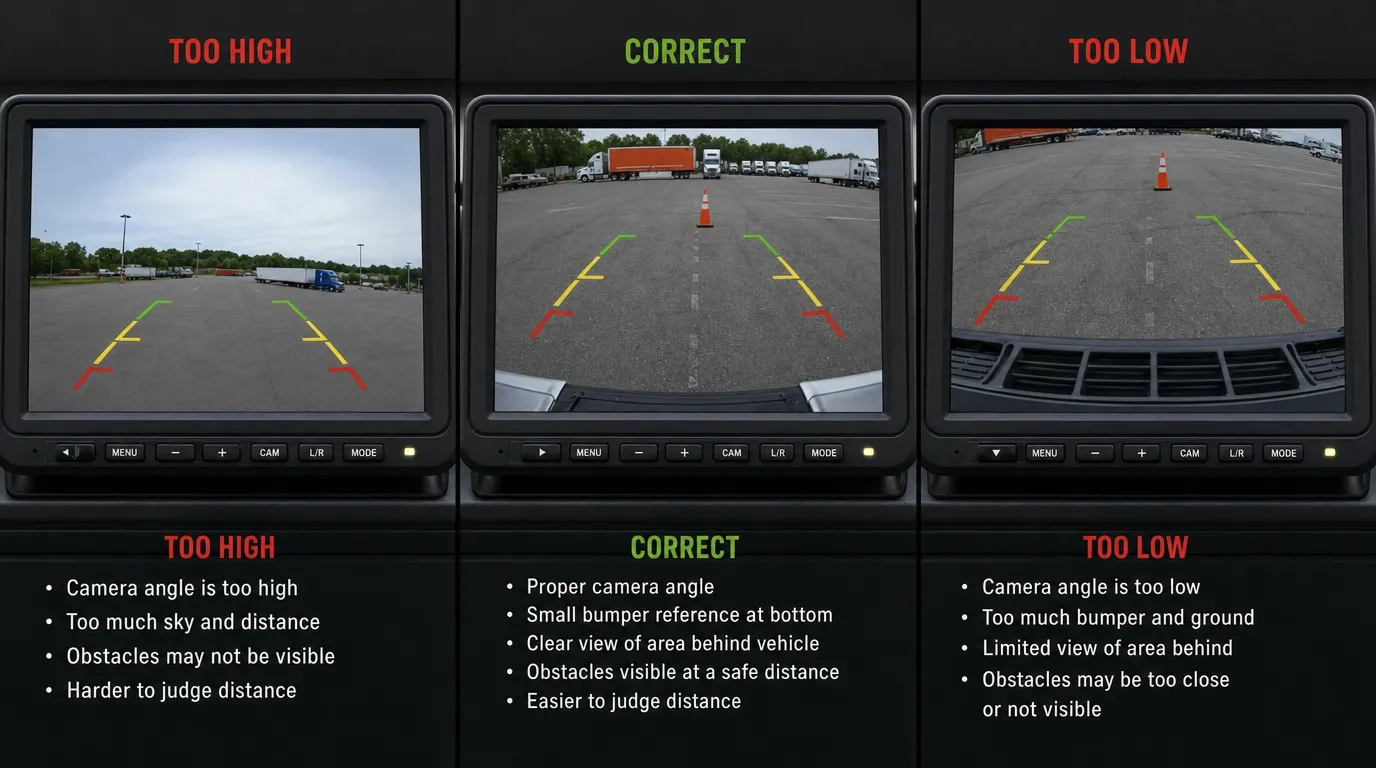
If the camera points too high, the driver may not see the ground close behind the vehicle. If it points too low, the monitor may show too much bumper or ground, making it harder to judge distance.
The best backup camera angle should help the driver see three things clearly:
- a small part of the bumper or rear edge
- the ground directly behind the vehicle
- enough rear distance to judge obstacles safely
This guide explains how to adjust backup camera angle correctly, how much bumper should appear on the screen, what happens when the camera is too high or too low, and how to set up a better rear view for cars, vans, trucks, trailers, forklifts, and commercial vehicles.
Quick Answer: What Is the Best Backup Camera Angle?
The best backup camera angle shows a small reference view of the bumper or rear edge, the ground directly behind the vehicle, and enough rear distance to judge obstacles safely.
In most cases, the bumper should only appear as a small reference at the bottom of the screen. It should not take up too much of the image.
If the camera shows too much sky, wall, or far distance, it is usually aimed too high. If the screen shows mostly bumper or ground, it is usually aimed too low.
There is no single fixed degree that works for every vehicle. The ideal angle depends on camera height, vehicle type, mounting position, monitor size, and the real reversing task.
For a full system overview, see our backup camera systems guide.
Backup Camera Angle vs Viewing Angle
Many people confuse backup camera angle with viewing angle, but they are not the same thing.
Backup camera angle means where the camera is aimed after installation. For example, the camera may point slightly downward, too far upward, or too close to the ground.
Kijkhoek, or field of view, means how wide the camera lens can see. A camera may have a 120°, 150°, or 170° viewing angle, but that does not automatically mean the rear view will be useful.
A wide-angle camera can still give a poor image if it is aimed too high or too low. At the same time, a correctly aimed camera may still feel limited if the lens view is too narrow for the vehicle.
A good rear-view setup depends on both the lens viewing angle and the final camera adjustment.
| Item | Meaning | Why It Matters |
|---|---|---|
| Camera angle | Where the camera is aimed | Affects ground view, bumper reference, and rear distance |
| Kijkhoek | How wide the lens can see | Affects side-to-side coverage and blind zone visibility |
| Mounting height | Where the camera is installed | Changes how much ground and distance appear on screen |
| Monitor display | How the image is shown to the driver | Affects distance judgment and daily usability |
For commercial vehicles, both camera angle and viewing angle should be considered together. A wide lens is helpful, but the mounting position and final adjustment are just as important.
How Much of the Bumper Should You See?
A small amount of bumper visibility is usually helpful because it gives the driver a clear reference for where the vehicle actually ends.
However, too much bumper on the screen wastes image space and reduces visibility farther behind the vehicle.
A practical backup camera view should show:
- enough rear-edge reference to understand where the vehicle ends
- enough ground view to see the close area behind the vehicle
- enough rear distance to judge obstacles and reversing space
- not so much bumper that it dominates the image
If the bumper takes up too much vertical space, the camera is probably aimed too low. If no rear edge is visible at all, close-range judgment may become harder.
For many vehicles, the bumper or rear edge should appear only as a small strip at the bottom of the monitor image. It should work as a reference point, not become the main focus of the image.
What Happens If the Backup Camera Angle Is Too High?
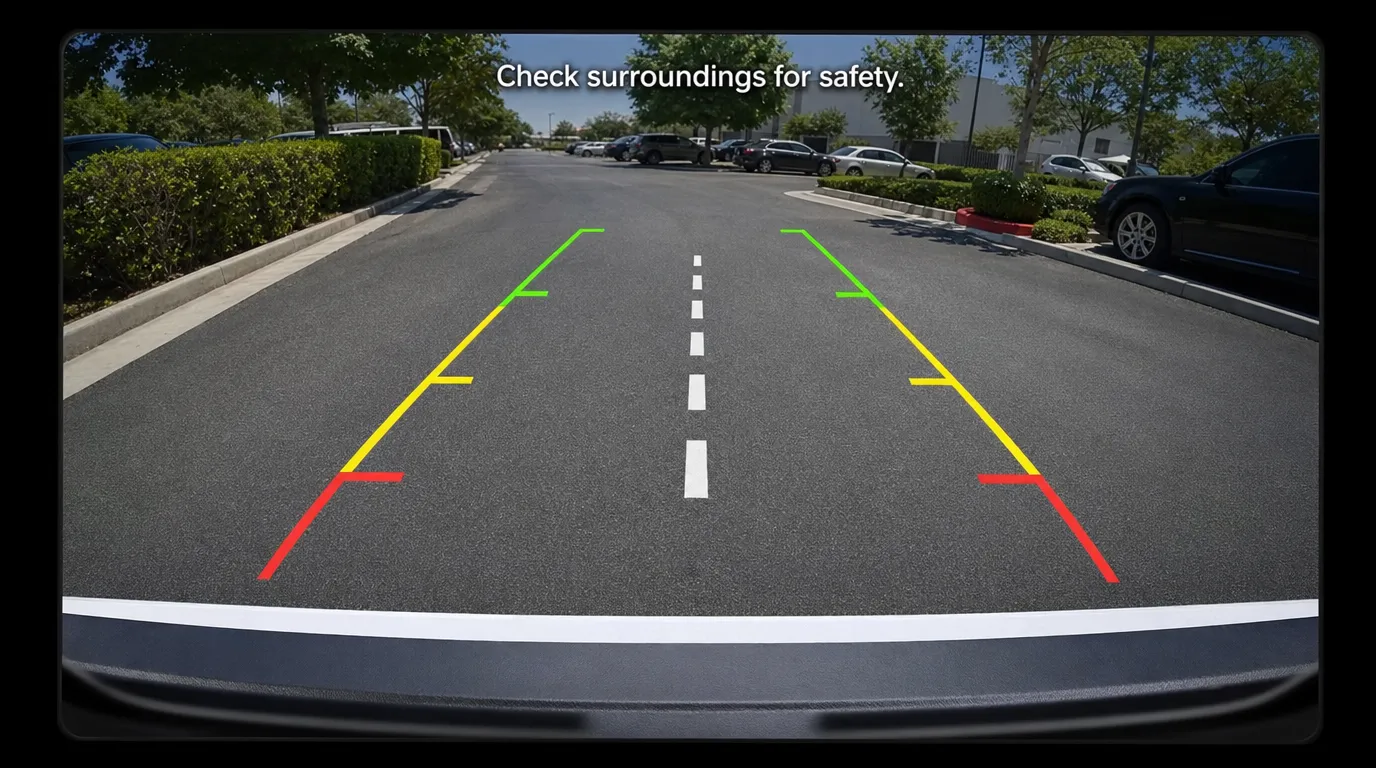
When a backup camera points too high, it usually shows more rear distance but less of the near-ground area behind the vehicle.
This can cause problems such as:
- poor visibility close to the bumper
- difficulty seeing low obstacles
- reduced confidence in tight reversing
- parking guidelines that feel inaccurate
- weak reference for where the vehicle actually ends
- higher risk of missing objects close behind the vehicle
A high camera angle may look impressive because it shows a wide rear scene, but it often hides the area that matters most during close-range reversing.
If your backup camera shows too much sky, wall, or far distance, the camera is probably aimed too high and should be tilted slightly downward.
What Happens If the Backup Camera Angle Is Too Low?
When a backup camera points too low, it usually shows too much ground immediately behind the vehicle and not enough useful depth farther back.
This can cause problems such as:
- too much bumper or ground filling the screen
- not enough rear-distance view
- reduced awareness of obstacles farther back
- poor balance between close detail and overall rear space
- a rear image that feels cramped or less useful
- difficulty judging the full reversing path
A low angle may help with very close positioning, but it can reduce the driver’s ability to understand the broader reversing environment.
If your backup camera shows mostly bumper or ground, the camera is probably aimed too low and should be tilted slightly upward.
How to Adjust Backup Camera Angle Step by Step
The best way to adjust backup camera angle is to use a real-world test area and judge the image based on actual reversing needs.
Step 1: Park on a Flat Surface
Use a level area so the camera view is not distorted by slope. This makes it easier to judge whether the image balance is correct.
If the vehicle is parked on an incline, the camera may appear too high or too low even when the actual installation angle is acceptable.
Step 2: Turn On the Rear Camera View
Activate the reverse camera image and make sure the monitor is showing the correct camera input.
Before adjusting the angle, confirm that the image itself is stable. If the image is distorted, delayed, flickering, or unstable, the problem may be related to wiring, signal transmission, power supply, or monitor settings rather than angle alone.
Step 3: Check the Rear Edge Reference
Look at the bottom of the monitor image. A small part of the bumper, rear step, or tail edge is usually helpful as a reference.
If too much of it fills the screen, the camera is likely aimed too low.
If none of it is visible, the driver may lose a useful reference for where the vehicle actually ends.
Step 4: Check the Ground Area Behind the Vehicle
Make sure the near-ground zone behind the vehicle is visible. This is especially important for low obstacles, parking blocks, tools, curbs, or small objects behind the vehicle.
If the ground area close behind the vehicle is missing or very limited, the camera is likely aimed too high.
Step 5: Check Rear Distance Visibility
Look at how much usable space behind the vehicle is visible. If the image only shows the immediate ground and does not show enough rear approach area, the camera is likely aimed too low.
A good angle should provide both close-range reference and enough rear distance for the driver to understand the reversing path.
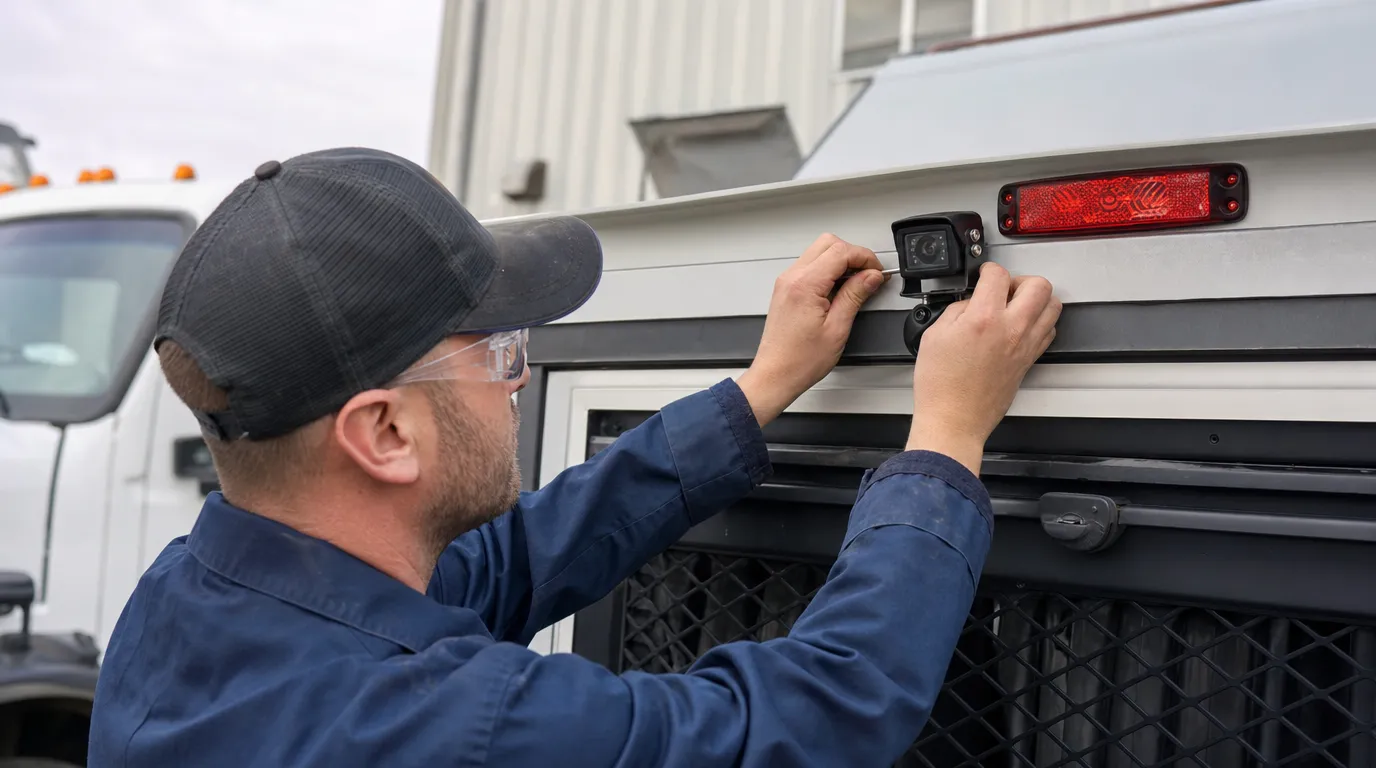
Step 6: Adjust the Camera Gradually
Make small angle changes rather than large ones. Even a slight tilt change can make a big difference in how useful the image becomes.
After each adjustment, check the monitor again from the driver’s seat. Do not judge the camera position only by looking at the camera from outside the vehicle.
Step 7: Recheck with Real Obstacles
Place cones, boxes, markers, or other safe reference objects behind the vehicle. Confirm whether the image helps the driver judge both close range and farther distance.
This step is important because a camera view can look acceptable on an empty surface but feel less useful when real obstacles are present.
Step 8: Test in the Actual Reversing Environment
If the vehicle is used for docking, warehouse operation, construction sites, trailer maneuvering, or fleet operation, test the camera in that real environment.
The best backup camera angle should work in the place where the driver actually uses it, not only in a simple installation test.
How to Adjust Different Backup Camera Mounts
Different camera mounting styles may require different adjustment methods.
License Plate Backup Cameras
License plate backup cameras are often used on cars, vans, and light-duty vehicles. Some models allow small angle adjustment through the mounting bracket.
To adjust this type of camera:
- loosen the mounting screws slightly
- tilt the camera up or down in small steps
- check the monitor image from the driver’s seat
- tighten the screws after confirming the view
Be careful not to overtighten the bracket before the final viewing angle is confirmed.
Bracket-Mounted Backup Cameras
Bracket-mounted cameras are common on vans, trucks, forklifts, trailers, and commercial vehicles. They usually offer more flexibility for angle adjustment.
To adjust this type of camera:
- loosen the side screws or bracket screws
- tilt the camera slightly upward or downward
- confirm the bumper reference and ground view
- tighten the bracket securely after testing
For commercial vehicles, always make sure the bracket remains strong enough to handle vibration, washing, and outdoor use after adjustment.
Flush Mount Backup Cameras
Flush mount cameras are installed into a fixed hole or housing. Their angle may be less adjustable after installation.
If the angle is not suitable, possible solutions may include:
- using a different camera with a more suitable lens angle
- changing the mounting position
- using an angled spacer if the design allows
- selecting a different installation surface
For flush mount cameras, the installation position should be checked carefully before drilling or final assembly.
Heavy-Duty Commercial Vehicle Cameras
Heavy-duty backup cameras are often mounted higher and used in more demanding environments. The adjustment should consider not only the monitor image, but also waterproofing, cable routing, vibration resistance, and driver viewing habits.
When adjusting a commercial vehicle backup camera:
- confirm the camera is securely mounted
- check that the cable has enough margin after adjustment
- avoid placing stress on waterproof connectors
- test the view with real reversing tasks
- confirm visibility in both daylight and low-light conditions
For fleets, the camera angle should also be consistent across similar vehicles so drivers do not need to adapt to a different view every time.
Best Backup Camera Angle by Vehicle Type
Different vehicles usually need different rear-view balance.
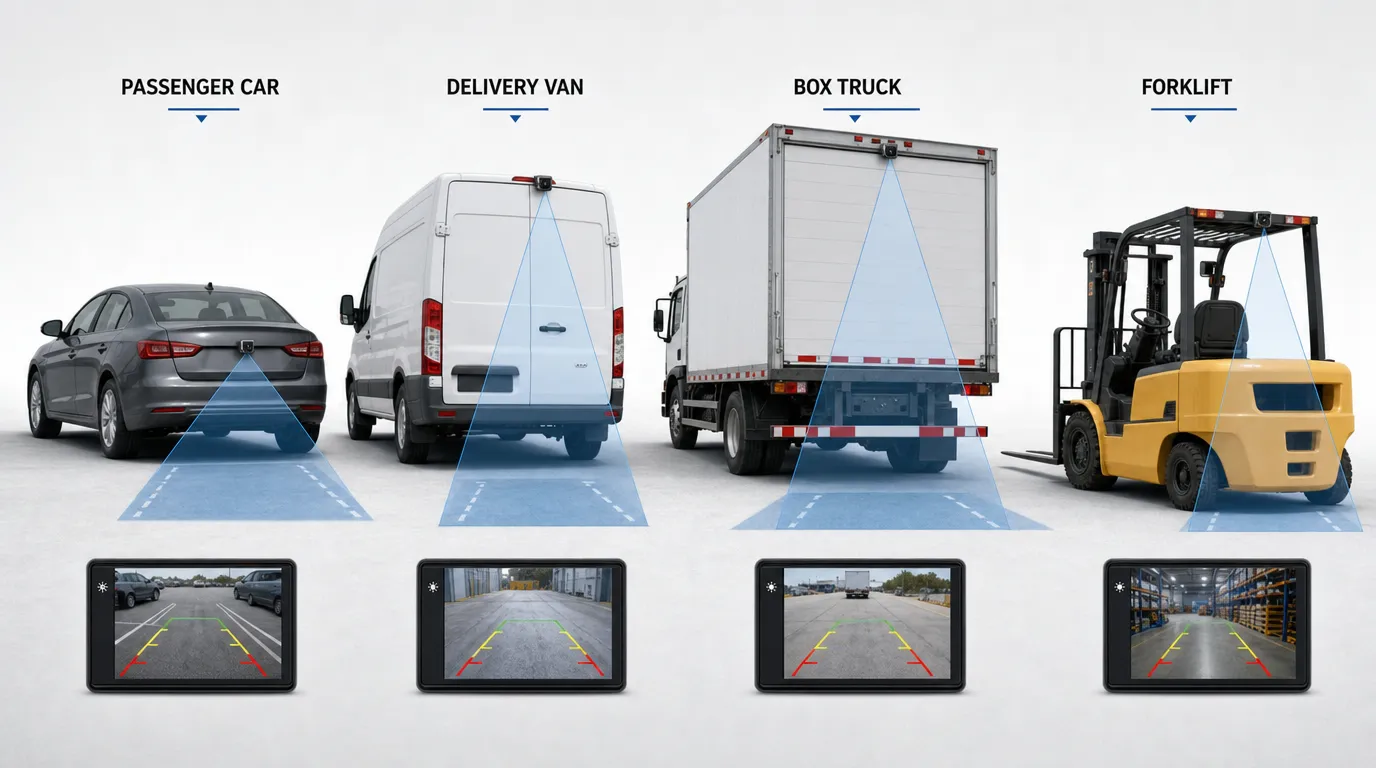
Passenger Cars
Passenger cars often need a balanced view for parking, daily reversing, and judging the distance to curbs, walls, or other vehicles.
A moderate downward angle usually works best because it provides both near-ground detail and enough rear-distance visibility.
Vans and Pickup Trucks
Vans and pickups often need stronger close-range visibility because the rear body is higher and natural rear visibility may be limited.
For these vehicles, the backup camera should not point too far back. The driver still needs to see the area close to the rear bumper.
Trucks and Commercial Vehicles
Commercial vehicles usually need a more task-driven setup. Depending on the use case, the camera may need to prioritize docking accuracy, rear obstacle awareness, loading area visibility, or reversing safety in yards and depots.
A fixed one-angle-fits-all approach is often not ideal for commercial setups. The best angle depends on the actual reversing task.
For large vehicles, it is also important to consider monitor size, camera resolution, cable quality, and night visibility. If the image is clear but still difficult to use, the problem may be related to the full camera system, not only the angle.
Trailers and RVs
Trailers and RVs often require a setup that balances close backing reference with broader rear-path awareness.
Because the rear body is often longer or higher, testing the angle in real maneuvering conditions is especially important.
For trailer applications, the driver may need to see not only what is directly behind the trailer, but also whether the trailer is aligned with the intended reversing path.
Forklifts and Industrial Vehicles
Forklifts and industrial vehicles often work in tight areas where pedestrians, pallets, racks, and other vehicles may be close to the rear.
For these vehicles, the backup camera angle should usually focus more on:
- close-range blind zones
- rear ground visibility
- pedestrian or obstacle awareness
- usable view in warehouses or industrial yards
A camera aimed too high may miss important close-range hazards. A camera aimed too low may not give the operator enough time to react to obstacles farther back.
For forklifts, warehouse vehicles, and industrial equipment, the best camera setup may also include a monitor, alarm output, radar detection, or AI pedestrian detection system depending on the safety requirement.
Why Parking Guidelines May Look Wrong After Angle Adjustment
Drivers sometimes assume parking guidelines are inaccurate because of software or monitor settings. In many cases, the real issue is that the backup camera angle does not match the expected guideline geometry.
If the camera is tilted too high or too low:
- distance judgment may feel wrong
- parking lines may appear less trustworthy
- reversing may feel less intuitive
- the driver may stop too early or too late
Before recalibrating the guidelines, it often makes sense to confirm that the camera angle is correct first.
After adjusting the camera angle, the on-screen guidelines may no longer match real-world distances. In this case, the guidelines should be recalibrated to match the updated camera view.
You can follow a step-by-step process in our guide on how to calibrate backup camera guidelines correctly.
Common Backup Camera Angle Mistakes
The same setup mistakes appear again and again during backup camera installation.
1. Showing Too Much Bumper
This reduces usable rear image space and often means the camera is aimed too low.
A small bumper reference is helpful. A large bumper area is not.
2. Showing Too Much Sky or Far Distance
This often hides close-range hazards behind the vehicle and usually means the camera is aimed too high.
The camera should help the driver see the area behind the vehicle, not only the distant background.
3. Ignoring the Real Reversing Task
The best angle for parking is not always the best angle for docking, trailer maneuvering, warehouse reversing, or commercial fleet operation.
Always adjust the camera based on how the vehicle is actually used.
4. Testing Only While Parked Indoors
The angle may feel fine in a static indoor test but become less useful in real outdoor reversing conditions.
Light, slope, obstacles, and working environment can all affect how useful the view feels.
5. Not Checking the Angle with Actual Obstacles
A camera angle should be tested with realistic reference objects, not just by casually looking at the monitor.
Cones, boxes, or markers can help confirm whether the driver can judge both close range and rear distance.
6. Expecting a Wider Lens to Fix Every Problem
A wider viewing angle can help increase coverage, but it cannot fix a badly aimed camera.
If the camera is pointed too high or too low, even a wide-angle image may still be difficult to use.
Simple Backup Camera Angle Check Table
| What You See on the Monitor | Likely Issue | Suggested Adjustment |
|---|---|---|
| Too much bumper or ground | Camera is too low | Tilt slightly upward |
| Too much sky or far distance | Camera is too high | Tilt slightly downward |
| No bumper or rear edge visible | Weak vehicle-end reference | Tilt slightly downward or recheck mounting position |
| View is wide but not useful | Poor angle balance | Recheck mounting aim |
| Guidelines feel inaccurate | Angle may not match line geometry | Re-aim before recalibrating guidelines |
| Image is clear but hard to judge | Wrong mounting height or viewing angle | Check full camera setup |
| Rear image is unstable | Signal, wiring, or power issue | Check system connection and cable quality |
How to Tell If the Backup Camera Angle Is Good Enough
A backup camera angle is usually good enough when the driver can do three things easily:
- identify the rear edge of the vehicle
- see the immediate ground zone behind it
- judge whether there is enough space to continue reversing safely
If one of these is missing, the angle often still needs adjustment.
A good backup camera view should feel natural to the driver. It should not force the driver to guess where the vehicle ends or how far away an obstacle is.
For commercial vehicles, the angle should also be tested by the actual driver or operator whenever possible. A view that looks acceptable to an installer may not always feel practical during daily operation.
If the Image Is Still Not Useful, the Problem May Not Be the Angle Alone
Sometimes the angle is only part of the issue. A rear-view image can still feel poor because of:
- dirty lens
- low image quality
- weak low-light performance
- unstable signal
- wrong monitor size
- poor monitor placement
- low camera resolution
- poor cable quality
- incorrect power supply
- unsuitable camera viewing angle
If the camera image appears unstable or inconsistent, the issue may be related to signal transmission, interference, wiring, or power supply.
You can identify the root cause and possible fixes in our guide on backup camera not working: common causes, signal problems, and fixes.
If you are still deciding which system type fits your vehicle or working environment, it also helps to understand the trade-offs between different setups. See our comparison of wired vs wireless backup camera systems.
Need Help Choosing the Right Backup Camera Setup?
A backup camera does not need the widest image. It needs the most useful image for the actual reversing task.
At VST, we provide backup camera systems, rear-view monitors, AHD cameras, wireless camera systems, and vehicle safety solutions for commercial vehicles, industrial vehicles, trucks, forklifts, trailers, and special equipment.
We can help you choose a practical camera angle, suitable monitor, and rear-view camera setup based on your vehicle type and working environment.
Contact VST for a recommended backup camera setup
FAQ
What is the best angle for a backup camera?
The best backup camera angle shows a small reference view of the bumper or rear edge, the ground directly behind the vehicle, and enough rear distance to judge obstacles safely. The exact angle depends on vehicle type, camera height, mounting position, and reversing task.
Should I see the bumper in my backup camera?
Yes, usually a small portion of the bumper or rear edge is helpful because it shows where the vehicle ends. However, too much bumper on the screen reduces useful rear visibility and usually means the camera is aimed too low.
Why does my backup camera show too much ground?
This usually means the camera is tilted too low. A slight upward adjustment can improve the balance between near-ground view and rear-distance visibility.
Why does my backup camera show too much sky or distance?
This usually means the camera is aimed too high. A slight downward adjustment can help show the area closer behind the vehicle more clearly.
Should a backup camera point straight back or down?
A backup camera should usually point slightly downward, not straight back. The goal is to show the rear edge, the ground close behind the vehicle, and enough rear distance for safe reversing.
Is 170 degrees better for a backup camera?
Not always. A 170-degree viewing angle can show a wider area, but objects may appear smaller or more distorted on the monitor. The best setup depends on vehicle size, camera height, monitor size, and how the vehicle is used.
Can the wrong camera angle affect parking guidelines?
Yes. If the camera angle is too high or too low, the parking guidelines may feel inaccurate even if the line settings themselves are correct. After adjusting the camera angle, the guidelines may need to be recalibrated.
Do commercial vehicles need a different backup camera angle?
Yes. Commercial vehicles often have higher mounting positions, larger blind zones, and more demanding reversing tasks. The best angle should be tested according to the real working environment, such as loading docks, warehouses, yards, construction sites, or trailer operation.

 Dutch
Dutch  English
  Spanish
  Japanese
  German
  Arabic